Bitbucket Cloud#
Follow the instructions below to set up the Codacy Self-hosted integration with Bitbucket Cloud.
Create an OAuth consumer#
To integrate Codacy with Bitbucket Cloud, you must register an OAuth consumer for Codacy on Bitbucket.
You can create a consumer on any existing individual or team account. To create a consumer, do the following:
-
On Bitbucket, click on your avatar on the bottom left-hand corner and select Bitbucket settings.
-
Select OAuth on the left sidebar and click the button Add consumer.
-
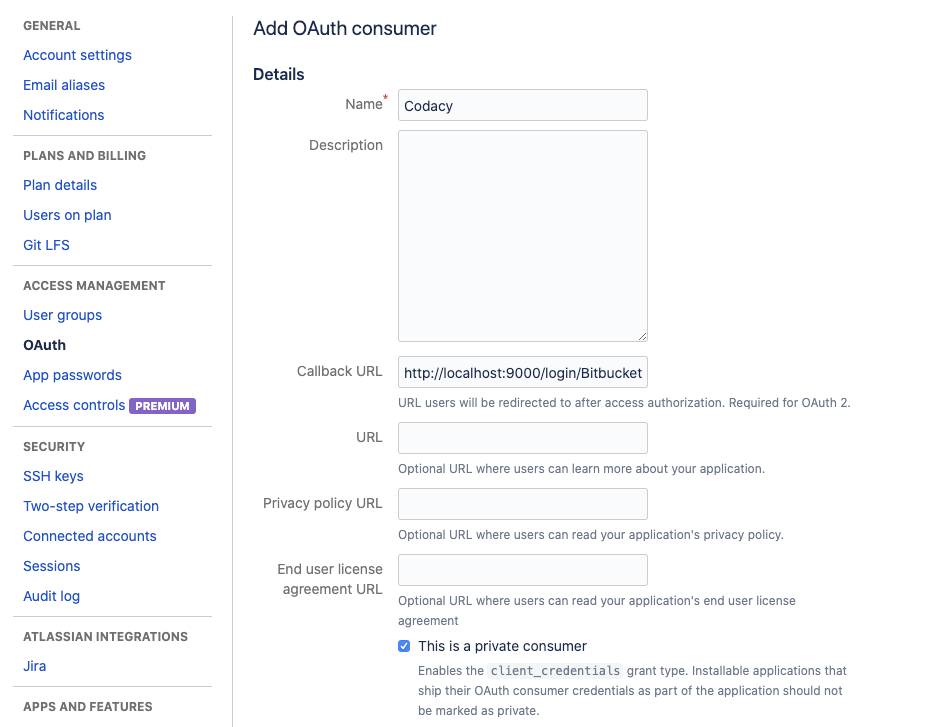
Fill in the fields to create the OAuth consumer:
-
Name: Name of the OAuth consumer. For example,
Codacy. -
Callback URL: Copy the URL below, replacing the HTTP protocol and hostname with the correct values for your Codacy instance.
https://codacy.example.com/login/Bitbucket?codacy_skip_ga=1 -
This is a private consumer: Enable the check box.
-
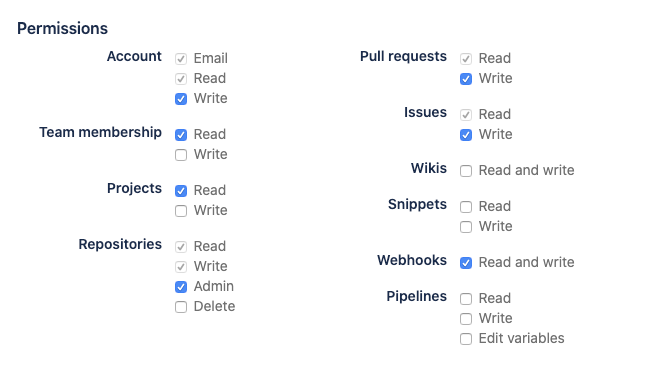
Add the permissions:
- Account: Write
- Team membership: Read
- Projects: Read
- Repositories: Admin
- Pull requests: Write
- Issues: Write
- Webhooks: Read and write
-
-
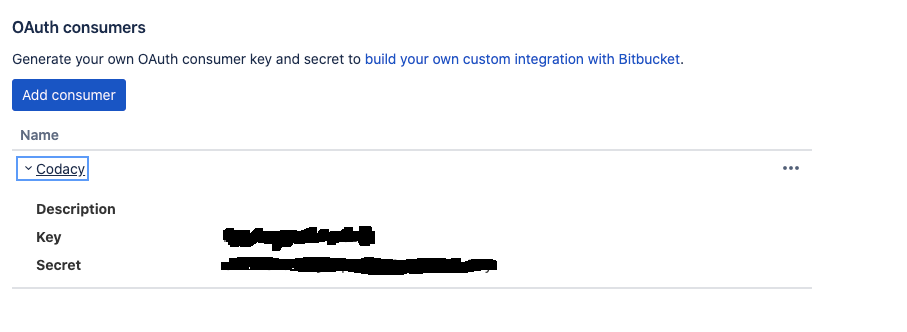
Click Save, and then click the name of the new OAuth consumer to take note of the generated key and secret.
Configure Bitbucket Cloud on Codacy#
After creating the OAuth consumer on Bitbucket Cloud, you must configure it on Codacy:
-
Edit the file
values-production.yamlthat you used to install Codacy. -
Set
global.bitbucket.enabled: "true"and define the remaining values as described below using the information obtained when you created the OAuth consumer:
global:
  bitbucket:
    enabled: "true"
    login: "true" # Show login button for Bitbucket Cloud
    key: "" # OAuth consumer key
    secret: "" # OAuth consumer secret
-
Apply the new configuration by performing a Helm upgrade. To do so execute the command used to install Codacy:
Important
If you're using MicroK8s you must use the file
values-microk8s.yamltogether with the filevalues-production.yaml.To do this, uncomment the last line before running the
helm upgradecommand below.helm upgrade (...options used to install Codacy...) \ --version 15.0.0 \ --values values-production.yaml \ # --values values-microk8s.yaml
After this is done you will be able to use Bitbucket Cloud to authenticate to Codacy.
Share your feedback 📢
Did this page help you?
Thanks for the feedback! Is there anything else you'd like to tell us about this page?
255 characters left
We're sorry to hear that. Please let us know what we can improve:
255 characters left
Alternatively, you can create a more detailed issue on our GitHub repository.
Thanks for helping improve the Codacy documentation.
Edit this page on GitHub if you notice something wrong or missing.
If you have a question or need help please contact support@codacy.com.